![]()
![]()
![]()
![]()
![]()
![]()
![]()
![]()
Last Update: 9th December 2019
The receiver should be tuned to the frequency you observe. In general, you need to tune the receiver once at the beginning of your observations (If you observe different frequency set-up with the same receiver on the same day, you tune the receiver at every changing the frequency set-up). Since tuning methods differ one by one, this page shows how to tune each receiver. Before moving to the following procedures, you should change the direction of mirrors in order to the receiver you use can receive the signal from the sky. If you will observe continuum, special set-up is needed. Please print your device tables and pass it to the assistant.
T70 receiver will be tuned with a program named that can be remotely accessed from the NRO_RemoteObs_4 viewer. Many windows usually are open in the NRO_RemoteObs_4 viewer. To find the program easily, you should check "T70 (1) - Remote Viewer" panel at the bar in the bottom of the desktop. If you click it, the program will appear the foreground of the desktop window.

The tuning program tunes the receiver via the machine located in the Nobeyama 45-m telescope. Usually, a remote connection is already established. If the connection is lost, push the "start" button and choose "remote desktop". Account-ID and password are memorised. If not, please ask the assistant.
T70 receiver is adjusted based on the assumption that a tuning procedure is performed at EL=70 degrees. Pushing "TUNING" button at the antenna console (found at the NRO_RemoteObs_3 viewer) enables the telescope set EL=70 degrees. Please do not forget to set the observation mode (push "ALL PROG" and "SLAVE" buttons on the antenna console) when you start observations.
To make the tuning programs an operation mode, you should push the "arrow" button on the top-left in the program.

Since T70 receiver is a 2SB (two sidebands) receiver, you can measure a sideband ratio (or, an image rejection ratio: IRR) when you tune the receiver. The measurements of the IRR enables you to calibrate the daily variation of the system. It allows you to convert the data into the main beam temperature (TMB) on the data reduction. It would be better off obtaining the IRR in case that your target lines seem to be weak (TA*< a few K) even for the standard source.
Here, we introduce the tuning procedure for the T70 receiver.
The tuning program is named as T70tune**.vi.
This program is usually already launched.
You can launch the program by double-clicking the desktop shortcuts if it is not.
In the case of stopping the program, please click the "STOP" button at bottom-left in the program.
The tuning program will start running when the "arrow" button on top-left in the program is pushed.
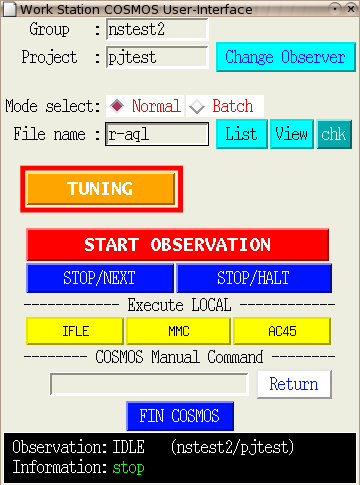
Press "MMC" on COSMOS GUI. The new panel, MMC Execute panel, will appear (it may already appear). Press "NEW" and "ROTATE" on the MMC Execute panel.


The choices are three: Upper Side Band (USB) only, Lower Side Band (LSB) only and both USB and LSB. Confirm that the one you chose and the setup in the device table are the same.

Y-factor (an index of noise, including atmosphere which is expressed in the unit of dB) at each sideband will be measured.

If the sky is not bad and Y-factor is low(< 1 dB), please check whether the direction of mirrors is correct and the chopper is rotating


These parameters are determined with the number of your target lines
Examples:
Only one line at IF 6GHz: start=6GHz, stop=6GHz, number=1 ...The IRR only at IF=6GHz will be measured
multiple-lines: start=4GHz, stop=8GHz, number=17 ...the IRR will be measured in the interval of 0.25 GHz between IF=4-8GHz
Notice: it takes about 2-3 minutes for the IRR measurement for 10 points

The instruction which will pop up. Measurements should be performed every polarisation one by one.
You can save the results by pushing the "SAVE" button. The default file name is <beam><polarization><yyyymmddhhmm>.txt.
Press "Tuning" at the tab bar. Then push the "Observation mode". You can now observe with T70 receiver.
Do not forget to copy the text file that contains the measured IRR. Your text files are found in the directory named "T70IRRdata" at the local desktop of T70 tuning window (not at the remote desktop of the window).
Go back to the top of this pageIt is no need to tune H22, H40, and Z45 receivers. After changing the direction of mirrors, you can start an observation by choosing the observing script at COSMOS GUI and pressing "START OBSERVATION" button.
Go back to the top of this pageMonitors for the FOREST receiver are placed in the NRO_RemoteObs_4 viewer. To tune the FOREST receiver and to monitor the status, three windows are used: "FOREST 1 (1) - Remote Viewer", "FOREST Monitor", "FOREST Live Camera".


The FOREST receiver can be tuned with the terminal shown in "FOREST 1 (1) - Remote Viewer". Since a tuning procedure for the FOREST is followed by the steps described below, it is convenient for you to use the command-line history (pressing the up and down keys at the terminal).
Enter the following command to initialise the FOREST receiver.
> forest_initialize.py
You can tune the FOREST applying the best parameters which the observatory previously measured.
The tuning command is as follows:
> forest_SIS_tune.py tuning/loXXG-UL_step3_yyyymmdda.cnf
where XX is the LO frequency, UL is a sideband which you intend to observe (Upper Sideband[USB], Lower Sideband[LSB] or USB/LSB), and
yyyymmdda is the date when the observatory measured the parameters.
Please select LO frequency as the frequency nearest to you specified in the device table.
(The observatory send the PI a filename which suits for your observations. Please use it unless there is any problem.)
For example, in the 2020-2021 observing season, the observatory prepares following tuning parameter sets (The names of parameter file may be changed during the observing season).
| LO Frequency [GHz] | Sideband | Name of a Parameter File |
|---|---|---|
| 86.5 | USB | lo86G_U_step3_20201112k.cnf |
| 87-96 | USB,LSB,USB/LSB | lo92G_UL_step3_20181025k.cnf |
| 99-101 | USB/LSB | lo98G_UL_step3_20201028d.cnf |
| 105-106 | USB | lo105G_U_step3_20201029b.cnf |
To check the performance of the FOREST,
you should measure the system noise temperature (Tsys) and the sideband separation ratio (or Image Rejection Ratio: IRR) along with different IF frequency.
First of all, push the "Tuning" button on the antenna console to set EL = 70 deg.
Measurements will be performed with the following commands:
> exp_irr_with_IF_freq_sweep.py --lo_freq 105 --start 4 --stop 12 --step 1
where "lo_freq" is the 1st LO frequency [GHz], which you specified in the frequency seting file (DeviceSetting_***_xlsx) that you submitted with your proposal,
"start" and "stop" are the IF frequency [GHz] where the measurements start and end, respectively.
Regarding the "lo_freq", the first decimal place may be enough because of the flatness of receiver performance.
"step" is the frequency interval [GHz] of Tsys and IRR measurements between "start" and "stop".
In the example above, the measurements are under the setup of the LO frequency of 105 GHz, IF range of 4-12 GHz with a step of 1 GHz.
These values should vary the observing frequency and numbers of target lines.
The required time differs the data number to measure: typically saying it takes a minute to obtain the data for the setup of IF = 4-12 GHz with 1 GHz step.
When the measurements end, the results will be shown on the terminal with values and the FOREST Monitor (bottom right area) with plots. If you click the plots on the FOREST status monitor, you can see the zoomed-up one (see the figure below). You can obtain the data by clicking a string under the plot (results_***_irr_if_sweep.zip).

Figure 4: Results are plotted on the bottom-left corner of "FOREST Monitor"

Figure 5: An example of Tsys and IRR measurements. Tsys in blue (the left axis) and IRR in black (the right axis).

Figure 6: The relations between the beams, the polarisations, and the sidebands in Figure 5
The FOREST is now ready for observations.
For a safety observation, we recommend you to run the following command to fix the tuning parameters unless you explicitly unlock.
> forest_start_observation.py
When your observation ends, please run the following command to make the FOREST tuning machine a standby state.
> forest_end_observation.py
In the end, set the FOREST itself a standby state.
> forest_finalize.py
Due to troubles (including misoperations), the terminal may not respond, or the tuning process may suddenly stop. In principle, we hope that you report the situation to the assistant and ask for help. But you may resolve a problem with the following process (please report the situation even if you could solve the problem by yourself).
> rforest_end_operation.py